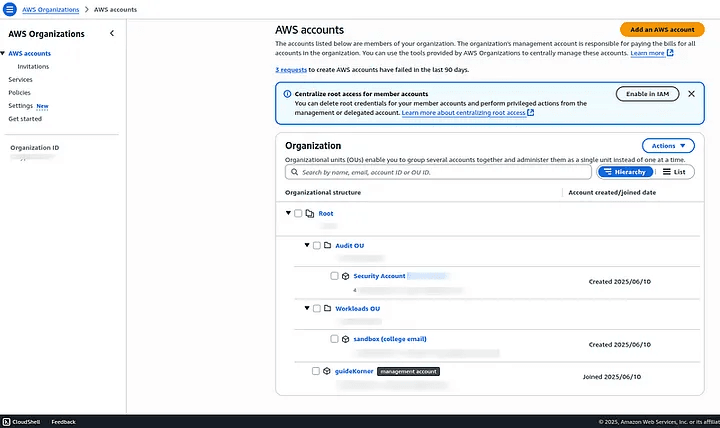
This is what we’ll be creating today in our AWS organizations setup: one root OU, two additional OUs, one management account under the root OU, and one member account in each of the two OUs.
It might seem overwhelming at first, and you might be wondering what all this means and how to create an AWS Organization. Don’t worry, let’s start from the very beginning.
Table of Contents
What Is AWS Organizations and Why Does It Matter?
Cloud environments can become complex fast. As your AWS usage grows, managing permissions, costs, and governance across accounts becomes a serious challenge. AWS Organizations offers a streamlined way to group accounts, apply policies, and centralize billing, all under one umbrella. This structure improves security, boosts efficiency, and makes compliance much easier to handle.
Rather than working within a single account for every team or project, AWS Organizations allows you to create isolated accounts for different use cases while still maintaining centralized control. This flexibility helps technical teams stay organized without sacrificing visibility or accountability at the top level. Take a look at AWS Organizations.
When Should You Consider Using AWS Organizations?
The right time to explore AWS Organizations setup is often sooner than most expect. Even small teams benefit from early structure, especially when multiple environments such as development, staging, and production are involved. Waiting too long can lead to account sprawl, inconsistent policies, and billing confusion.
If your organization is scaling, working with multiple departments, or planning for long-term cloud governance, adopting AWS Organizations early can make a real difference. The structure provides a foundation that grows with you, rather than needing to be retrofitted later.
Who Can Benefit from AWS Organizations?
This tool isn’t limited to large enterprises or advanced cloud teams. Freelancers, startups, and educational institutions also find value in setting up AWS Organizations. Centralized billing is especially helpful for managing budgets across multiple projects. Security teams appreciate the ability to enforce Service Control Policies (SCPs) across accounts, reducing the risk of misconfigurations or over-permissioned roles.
For finance and operations teams, consolidated billing brings clarity to usage trends and cost forecasting. For technical leads, having consistent permissions and access boundaries across accounts improves deployment confidence.
Why Is a Proper AWS Organizations Setup So Important?
A well-planned AWS Organizations setup doesn’t just keep things tidy, but it also enforces structure and enables scalability. With clearly defined Organizational Units (OUs) and policies in place, teams can move faster without worrying about stepping outside compliance boundaries. Access controls can be managed with precision, and account activity becomes easier to audit.
Improper setup or lack of structure can lead to costly mistakes, from billing surprises to security breaches. By investing a little time upfront, you gain long-term stability and peace of mind. That’s why understanding how to set up AWS Organizations properly is one of the most important steps in any growing AWS strategy.
You may also like: Automating MFA in an Amazon EC2 Instance: Mastering Secure Access
How to Create an AWS Organization?
The first step in the AWS Organizations setup is creating the organization itself. This is typically done from your management account, also known as the root account. It’s the account that will have full administrative control over the entire organization.
After signing in to the AWS Management Console with your root account, navigate to the AWS Organizations service. Once there, you’ll be presented with the option to create your organization. The interface is clean and straightforward, designed to guide you through the process without needing an extensive technical background.
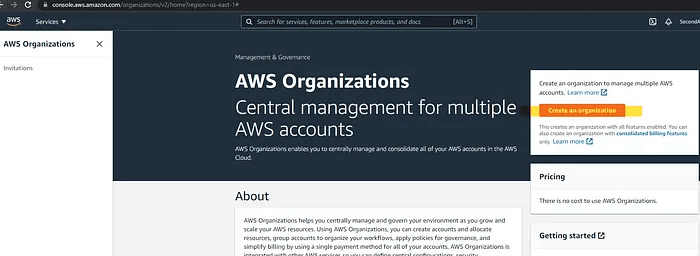
You’ll see a screen that gives you an overview of what AWS Organizations does, and grouping accounts, applying policies, and simplifying billing. From here, you can choose to create an organization with just a single click. AWS will automatically designate the current account as the management account, and from that point forward, you can begin adding new or existing AWS accounts under its umbrella.
There’s no cost for using AWS Organizations itself, which makes it accessible even for teams with limited budgets. However, it’s important to set up the organization thoughtfully. Naming conventions, account structure, and policies should all be considered from the start, as they will affect how easily you can scale and manage resources in the future.
How to Create an Organizational Unit (OU)?
Once your organization is set up, the next step is to create Organizational Units, or OUs. These act like folders that help you group accounts based on purpose, department, environment, or any structure that fits your organization’s needs.
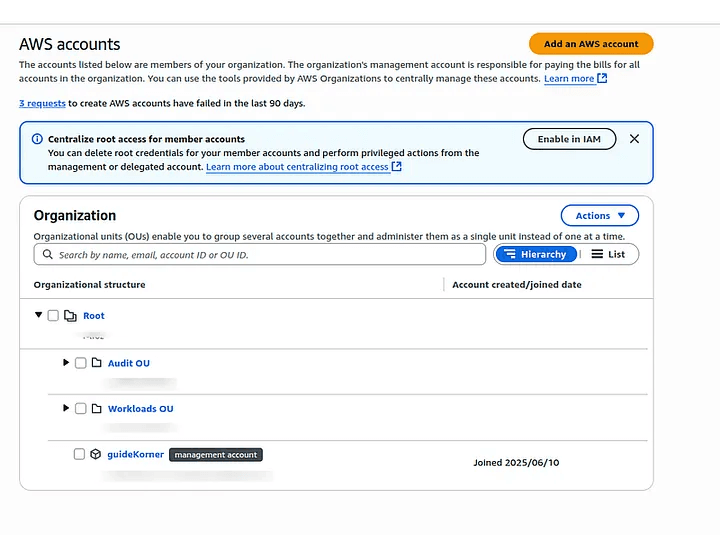
In the image below, you may notice that some OUs already exist. That’s perfectly normal, especially if you’re exploring the console after a test or prior setup. Don’t worry, I’ll walk you through the process of creating your own from scratch.
Start by selecting the Root OU, which is the default top-level container for all accounts in your organization. From there, you’ll see an option to create a new Organizational Unit. This option allows you to assign a clear name to your OU, something meaningful and specific, such as “Audit”, “Workloads”, or “Security”. Choose a naming convention that will remain clear as your AWS environment expands.
After you name the OU, confirm the creation. Your new unit will now appear beneath the Root in the organizational structure. It can now be used to house one or more AWS accounts. These accounts can either be newly created or invited into your organization from external sources.
Creating OUs early in your AWS Organizations setup provides long-term clarity. They allow you to apply policies in a more targeted way and make it easier to manage access, billing, and compliance for each logical part of your cloud environment.
How to Add an AWS Account to Your Organization?
Now that your Organizational Units are in place, it’s time to start adding AWS accounts to your organization. This is a key part of the AWS Organizations setup because it allows you to bring different projects, teams, or departments under a single management umbrella.
There are two ways to add accounts. You can either create a brand-new AWS account directly within the console or invite an existing one to join your organization. Both options are straightforward, and we’ll go through them step by step.
Option 1: Create a New AWS Account
This method is useful when setting up environments for development, testing, or isolating services. AWS makes the process simple:
- Enter an account name. Choose something descriptive and easy to recognize, like sandbox, dev-team, or analytics-prod.
- Provide the email address of the person who will own or manage this account. Be sure this email is not already associated with another AWS account.
- Specify the IAM role name. You can leave this as the default (usually OrganizationAccountAccessRole) unless your organization has specific naming conventions.
Once submitted, AWS will automatically create the account and link it to your organization. The IAM role you define here will later appear in the newly created account, allowing the management account to assume control if needed. Make sure to keep track of the email address and IAM role for future reference.
AWS will now send an email to your entered valid email address.
Note: AWS requires each account to be associated with a unique email address. If you’re creating multiple accounts under the same domain, consider using aliases (e.g., admin+dev@yourcompany.com) to manage them more easily.
Moving Member Accounts into Organizational Units
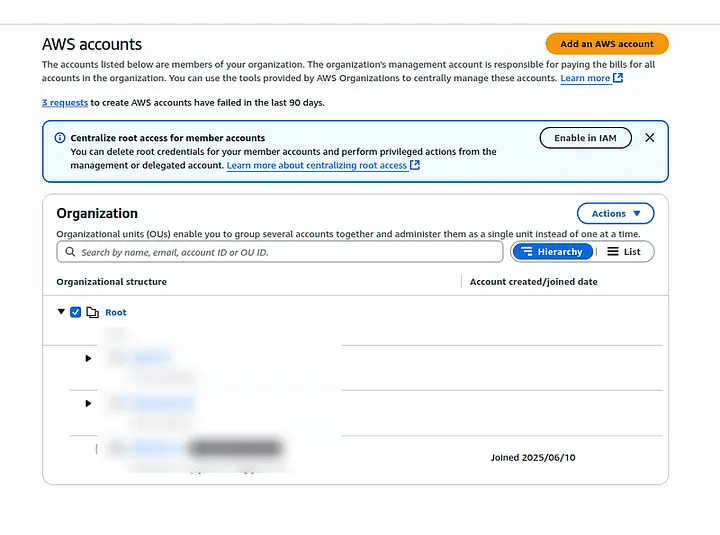
You may notice that when a new member account is created, it initially appears under the Root level of your organization. This is expected behavior. To maintain a well-structured hierarchy, it’s best to move the account into the appropriate Organizational Unit (OU).
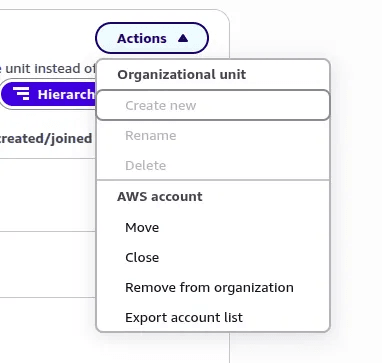
To do this, select the member account, open the Actions dropdown menu, and click on Move. From there, choose the OU where the account should be placed. Once confirmed, the account will shift under the selected OU, giving you better control and organization.
Pro Tip: Selecting “Remove from organization” will detach the account from your structure, but it won’t delete the account. The account becomes a standalone AWS account, retaining its existing resources and credentials.
Option 2: Inviting an Existing AWS Account
In addition to creating new accounts, AWS Organizations gives you the ability to invite existing AWS accounts to join your organization. This is helpful when you’re consolidating resources across departments or managing client environments centrally.
To invite an account:
- Enter the email address associated with the AWS account.
- Send the invitation from your management account.
The recipient will receive an invitation email and must accept it from their AWS console. Keep in mind, the invited account must not already belong to another AWS Organization, either as a member or a management account.
After acceptance, return to your management account. You’ll see the new account listed in your organization and ready to be moved into an OU.
A Note About Quotas
Sometimes, while creating or linking accounts, you may encounter a “Quota not available” or “Quota exceeded” error, even if you’re well within expected limits. This happens because AWS enforces default quotas on the number of accounts or policies that can be created within an organization.
If this occurs, don’t panic. Simply head to the Service Quotas console and request a limit increase for your AWS Organizations quota. In some cases, AWS support may need to approve the request manually. After your quota is increased, you can retry the operation, and it should work as expected.
This is a common hurdle, especially for new organizations growing quickly, just another reason to plan during setup.
We’re not including screenshots here for option 2. Please consider this a hands-on assignment. Follow the steps yourself to practice what you’ve learned. If you encounter issues, feel free to leave a comment or contact us at guidekorner@gmail.com
